
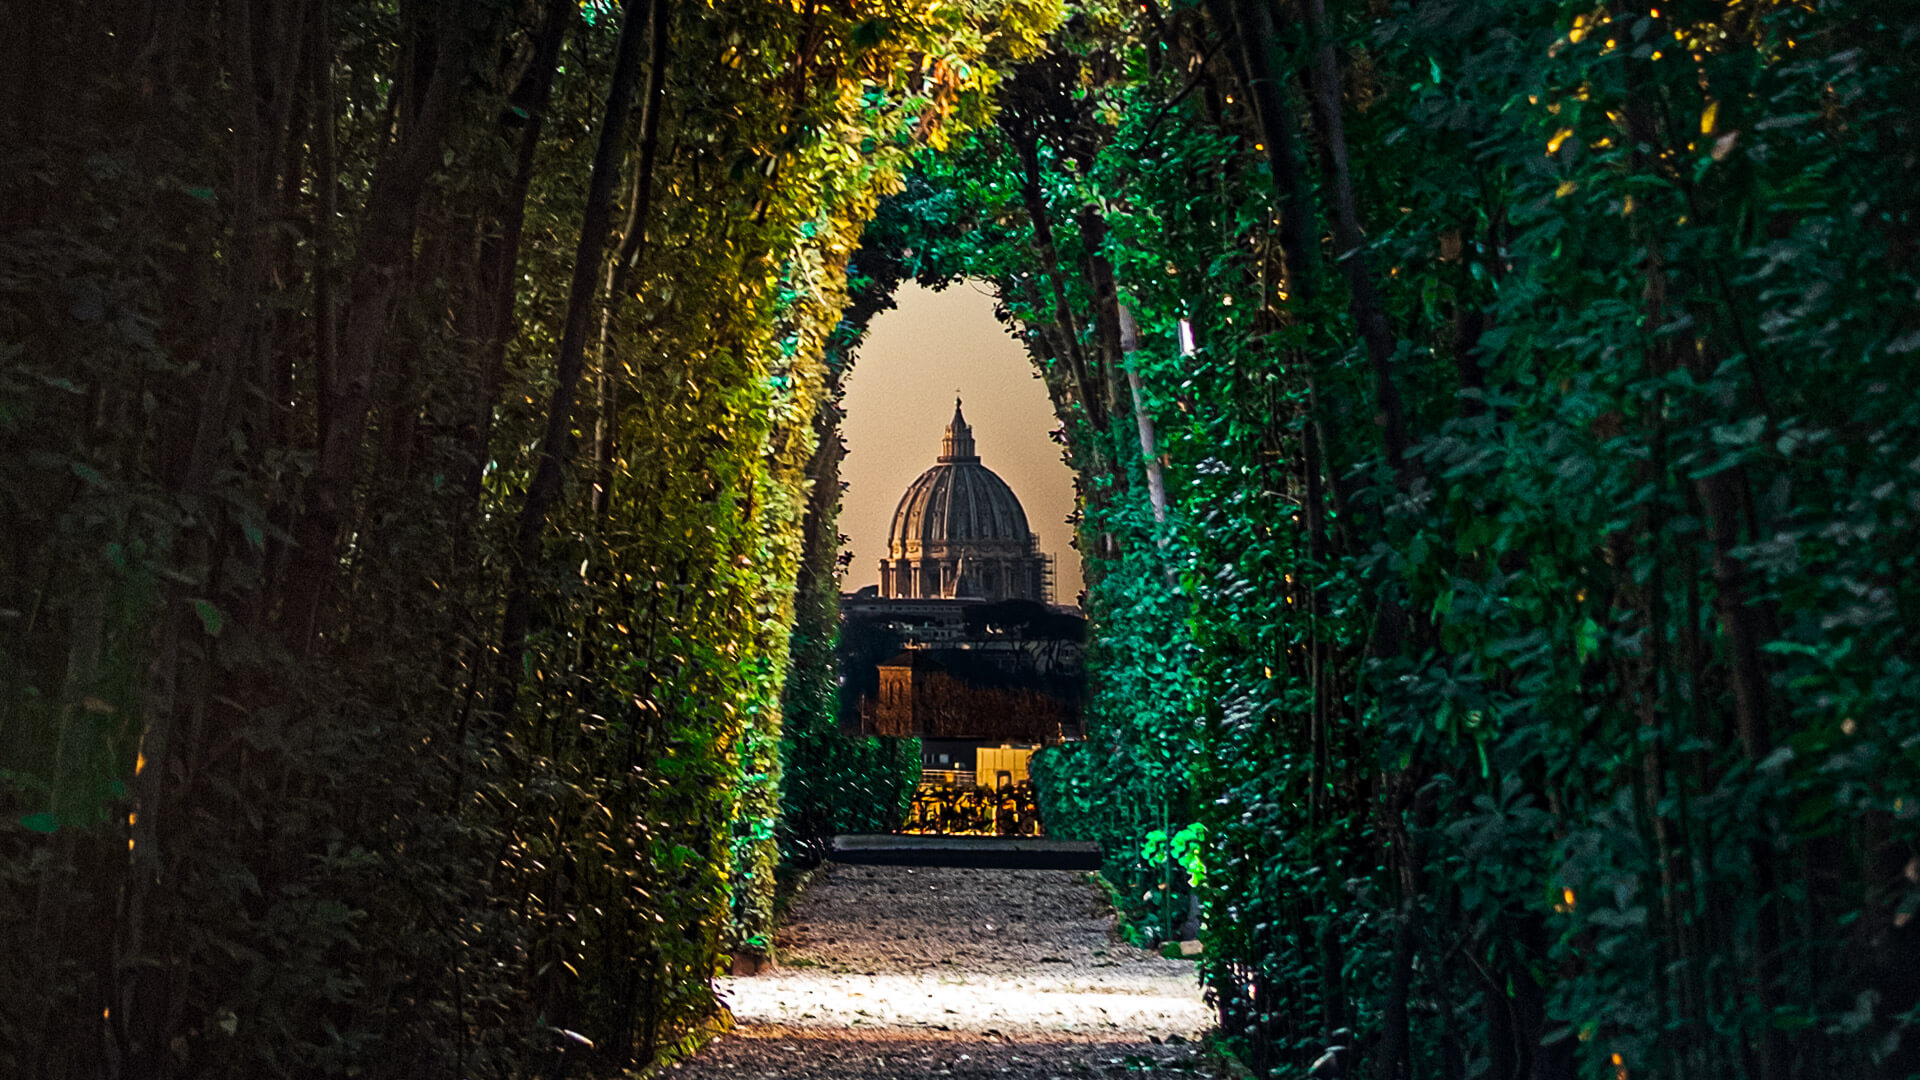
Photoshooting St. Peter’s Basilica through the Aventine Hill Keyhole is one of the top experiences in Rome! It is a bit challenging and we can help you make that shot! Maybe it lasts just some minutes but the view that you will get is unbelievable. It is between a live advertisement, made in Photoshop (or Gimp) for the Vatican and Rome city, and a scene from a Dan’s Brown book.
Let’s dive into the world of photography and uncover the charm of Rome’s Aventine Keyhole together!

How to get there – Where is the keyhole in Rome
The Aventine hill Keyhole is located in Aventine Hill and is one of the Seven Hills of Rome in Piazza dei Cavalieri di Malta. It is around 3.5 kilometers from the Central Termini and you can go either by using the Metro or by bus. We went on the 1st of January 2020 around 14:00 and we were waiting around one hour and a half in the queue line but it was totally worth it.
How to make the photo through Aventine Hill Keyhole
What time to visit Aventine Keyhole
The most important thing in photography is the sunlight path. The sun’s path changes day by day and season by season. Plan carefully the time of your visit. What you want to avoid is the sun behind St. Peter’s Basilica, a fact that will make it very difficult to make the shot.
We cannot advise you when to go as we went only once in the wintertime, but we can tell you how you can see the sunlight path on the day that you will visit Rome.
First, you have to visit SunsetEarthTools.com. In the search engine, you will type the Vatican and the date that you are planning your visit. You will get the following graph.

Alternatively, you can download the pdf version to make everything more clear to you.

The Aventine Hill is southeast of the Vatican at around 130 degrees. This means that during the specific day, we will not have the sunlight against our camera lenses. During the spring and summertime though we should avoid the evening hours.
Using a Camera to Capture the Aventine Hill Keyhole in Rome
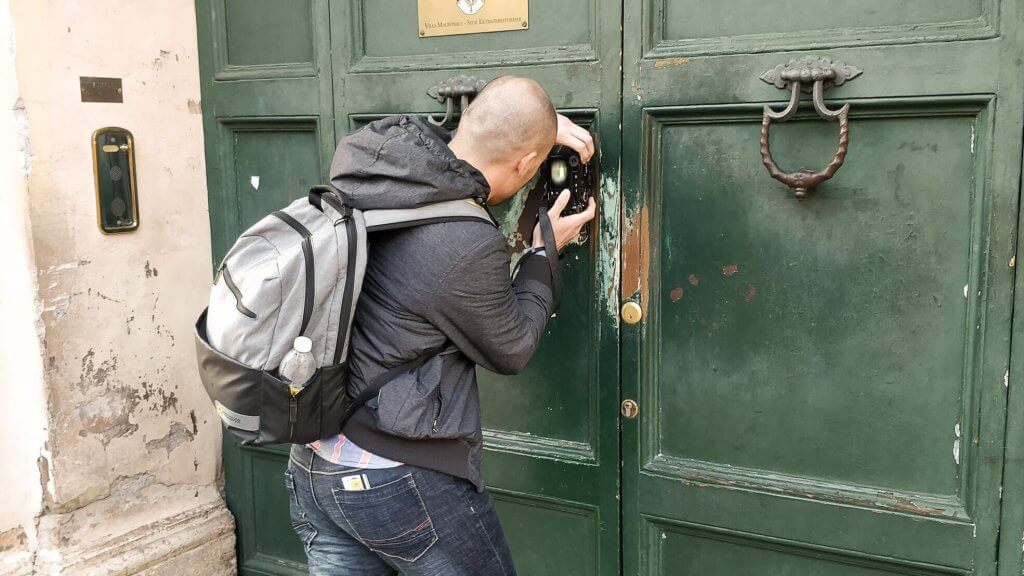
Do not forget that the main object that we want to photoshoot, St. Peter’s Basilica, is almost 3 kilometers away. This is why you have to stabilize the camera on the door or use a tripod. Using a tripod though is not a good idea except if you will be really fast. Otherwise, the qeue line behind may have complaints.
Do not be afraid to go manual! Or at least partially manually. Set the Aperture of the camera in the highest value that your camera lens has, focus, and take the shot!
The shutter speed should be the highest possible when your ISO should be more or less 200. It will be a unique view both for your camera and your eyes! The exact settings that we used were ISO 200, Aperture f/2, Exposure time 1/1300 with a Fujifilm x-pro2 camera and Fujinon 35mm f2 lens.
Make multiple photos by focusing on the center and in the gardens. After using simple software you can combine those two photos and get the perfect result!

Using your smartphone to capture the Aventine Hill keyhole in Rome
Using your smartphone to make the picture can be a bigger challenge but is not impossible. The latest smartphones have really good cameras that can take the photo. The only trick that you will need on that occasion is to stabilize the phone in the door, focus in the middle, and control the brightness.
For example, in OnePlus Android phones, controlling the brightness can be achieved by continuously pressing on the focus spot. This way the AE/AF is locked and by sliding our finger up and down anywhere on the screen we can adjust the brightness value. By doing this you “say” to your smartphone to ignore everything else and “auto exposure/autofocus” in a steady spot, the Basilica. The quality depends always on the mobile’s camera(s).
Edit the photo
You do not need to be a professional to make a couple of changes to your photos. The tricky part in this photo is that we need different edits in the two different areas of the photo which are the St. Peter’s Basilica and the gardens.
For St. Peter’s Basilica, we have to increase the contrast and the clarity values while we should put down the highlights and the shadows. To bring light to the beautiful gardens, we should move in the opposite direction by increasing the highlights and the shadows. The increase of the texture will be good for the entire photo.
Free software like Gimp can make the job perfectly. If you are not familiar at all with photo editing you can always drop us a message!
Pin it for later ⇟
Don’t forget to check out our other cool Rome guides, like exploring city plazas, finding top things to do, and discovering great eats.


Hey! I just was on a trip and used your advice to get this picture thank you! How do you stack multiple images on top of each other?
Hello Charles! Thank you for reaching out! We are glad that we helped! 🙂 You will have now to “Blend” the two photos using Photoshop or Gimp. There are many guides online to help you out with this depending on which software you have. Have in mind that Gimp is totally free!